This website uses cookies so that we can provide you with the best user experience possible. Cookie information is stored in your browser and performs functions such as recognising you when you return to our website and helping our team to understand which sections of the website you find most interesting and useful.
Font Size:
Introduction
Key Features
Uniqueness
Frequently Asked Questions
Open-Source?
Registration Needed?
Installation Required?
AI-empowered?
Specifications
URL:
Country or Region:
Author(s):
Availability:
Operating System(s):
Language(s):
Registration Needed:
Installation Required:
Video Demonstration
User Guide
This guide outlines how to register for Readwise, connect sources, import content, use the AI assistant, manage feeds, and export knowledge. This guide introduces a selection of key features from Readwise, including: - Access the Readwise Website - Connect Highlight Sources - Import Content to Readwise Reader - Chat with Ghostreader AI - Setup RSS Feeds - Export Knowledge Bases to Obsidian
1. Access the Readwise Website
| a. | Navigate to the website: https://readwise.io/read; |
| b. | Click GET STARTED to begin the registration process (Note: This creates a new account, which includes a 30-day free usage limitation); |
| c. | Select to sign up with an Amazon Account or Email; |
| d. | Follow the on-screen instructions to complete the profile setup. |
2. Connect Highlight Sources
| a. | Click the + icon on the left panel; |
| b. | Select Configure integrations; |
| c. | Select Connect for a platform, such as Kindle, Omnivore, or Instapaper, to synchronise it; |
| d. | Input the required credentials for the selected platform to authorise the connection; |
| e. | Click the Readwise logo on the left panel to return to the main page. |
3. Import Content to Readwise Reader
| a. | Click the + icon on the left panel; |
| b. | Select Upload; |
| c. | Upload a local file to the library (Note: Supported formats include PDF, OPML, XML, EPUB, CSV, and ZIP); |
| d. | Click the uploaded document to enter the reading view; |
| e. | Click the + icon on the left panel; |
| f. | Select Get browser extension; |
| g. | Click Install, then Add to Chrome, and finally Add extension to install the Readwise Highlighter extension; |
| h. | Click the puzzle piece icon in the top-right of the browser; |
| i. | Click the pin icon next to the extension to keep it visible on the toolbar; |
| j. | Open any webpage, and click to enable the Readwise Highlighter extension; |
| k. | Select text with the cursor to create a highlight (Note: The webpage content is automatically saved to the Readwise Reader). |
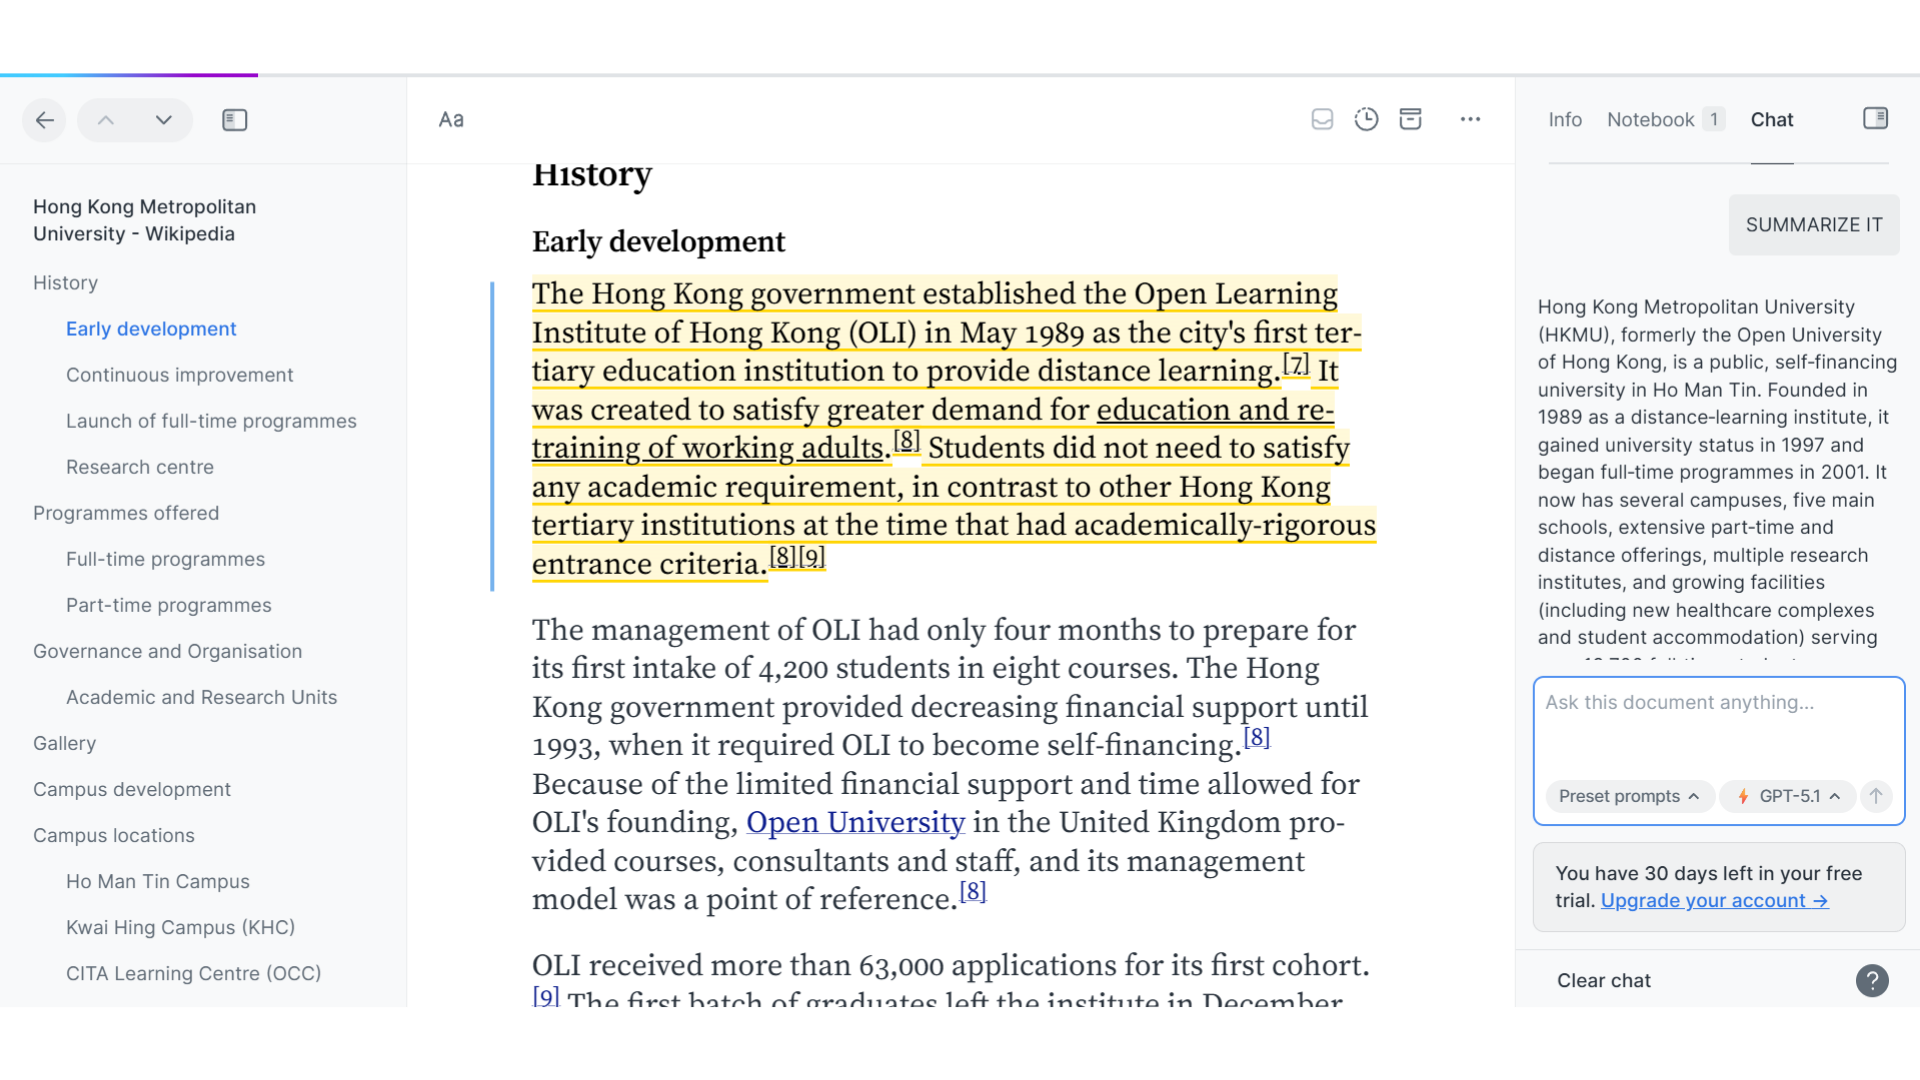
4. Chat with Ghostreader AI
| a. | Open a document within the Reader Library; |
| b. | Select a section of text to reveal the context menu; |
| c. | Select the Chat tab on the right panel to access the AI assistant features; |
| d. | Input a prompt in the chat box to chat with Ghostreader (Note: GPT-5.1 Fast or Thinking can be selected). |
5. Setup RSS Feeds
| a. | Click the + icon on the left panel; |
| b. | Select RSS Feeds; |
| c. | Search for a feed using keywords; |
| d. | Click the + button to subscribe to the feed; |
| e. | Navigate to the Feeds section on the left panel; |
| f. | Review the articles from the subscribed feed. |
6. Export Knowledge Bases to Obsidian
| a. | Open the Obsidian application; |
| b. | Click the Settings button; |
| c. | Select Community plugins; |
| d. | Click Browse; |
| e. | Search for Readwise Official; |
| f. | Click Install and then click Enable; |
| g. | Select the Readwise Official tab in the left sidebar within Settings; |
| h. | Click Connect > Initiate Sync to synchronise highlights and notes to Obsidian. |
Educational Scenarios
Educators' Perspectives
Learners' Perspectives